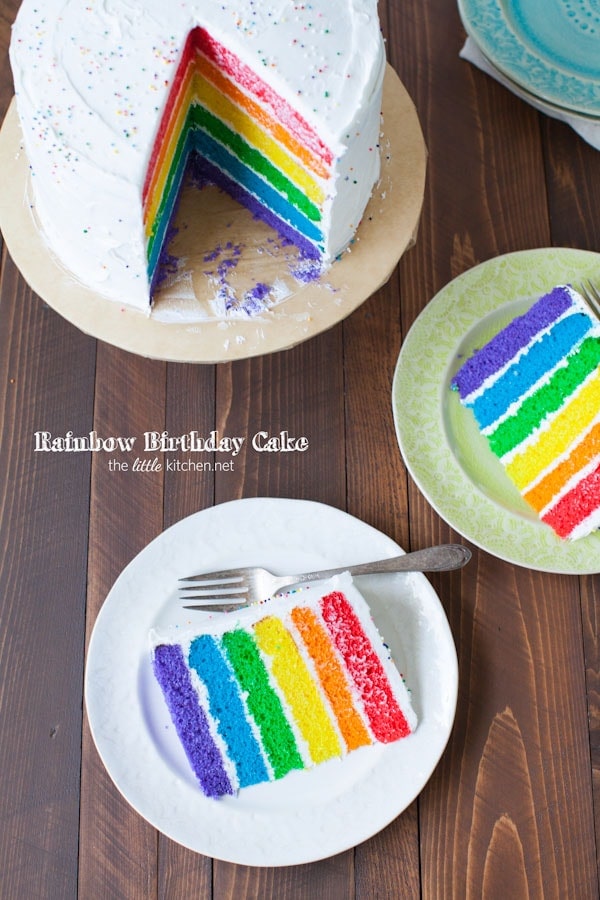
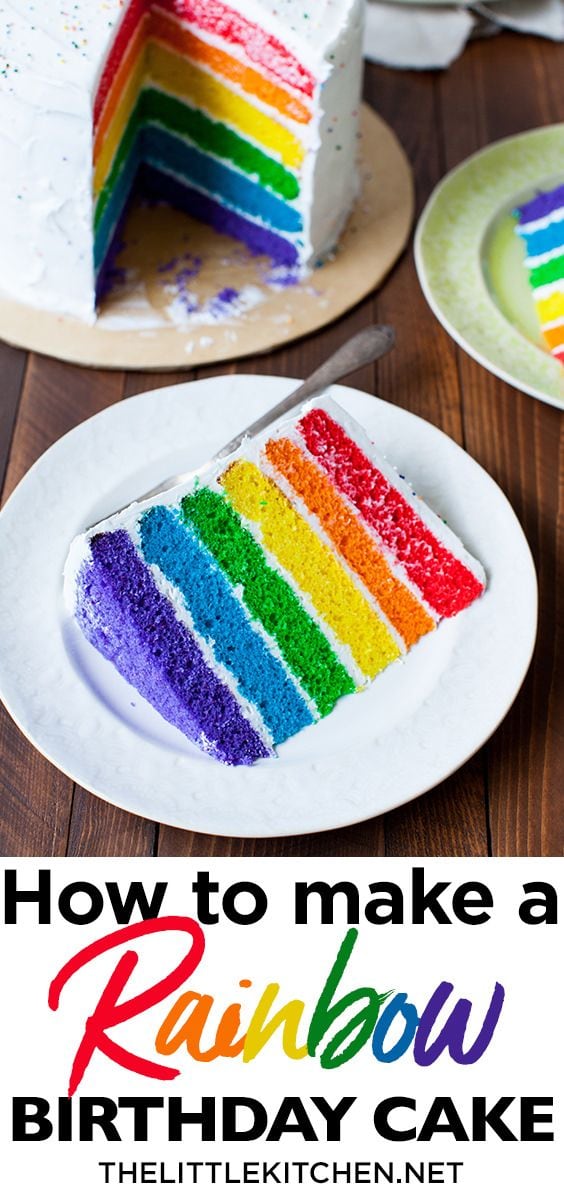
You might think making a rainbow birthday cake is hard and you would be wrong. It's actually really easy to put a rainbow cake together, there are step by step photos to help you make your first rainbow cake!
This post is sponsored by Betty Crocker.
Birthdays are a time for celebrating…you, your family members and your friends! But why is it a cause for stress sometimes? It shouldn't be. I still remember my birthday parties as a kid, vividly. I remember the taste of the cakes I had (yum!), the games we played and how I felt. That's the most important part, I felt special and it was my day.
Everything including the cake doesn't have to be perfect. You can make the cake and do it yourself…yes, you can and it doesn't have to be perfect (I'm repeating myself I know but it needs to be repeated). Because you're celebrating someone and their birthday, that's the most important part to remember. Because how you make them feel will be the most memorable thing about their birthday, not how perfect the tablecloth was or how perfect anything was. Believe me, as I'm typing this, I have to remind myself constantly. A perfectionist at heart, it's hard to let go of perfection. But I know I need to because that stress and that worry to make it all perfect comes at a cost.
I have always wanted to make a rainbow cake. I have always wanted to do it…like seriously it has been on my baking bucket list. So when, I had this opportunity to work with Betty Crocker (so exciting since I'm such a huge fan of the brand!), I wanted to try my hand at this rainbow cake.
It was so much fun and hopefully with my straightforward photos and steps, you can do it too! It will be perfect for your next birthday celebration. You can do it…if I can…you can too! 🙂


A trick I learned a long time ago, trace with a pen along the edge of the cake pan over wax paper or parchment paper. And then cut it out.
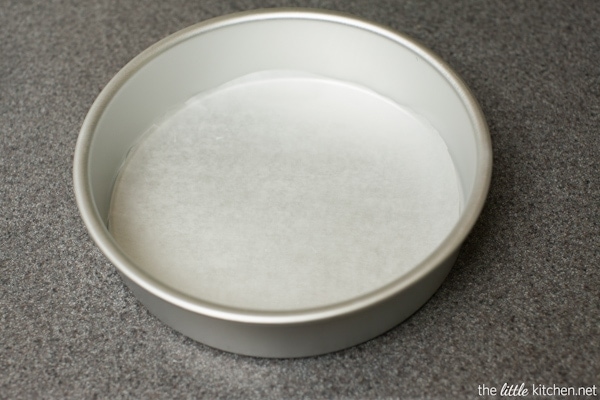
This will keep the cake from sticking to the bottom of your pans!
I mixed one Betty Crocker SuperMoist White Cake Mix at a time. Since I did happen to have 3 cake pans that are the same size (I used to be a hobby cake decorator a long time ago). It's perfect because one box of cake mix makes 3 thin layers perfectly!
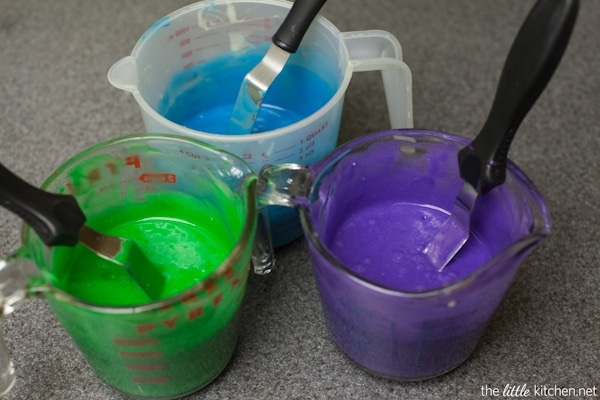
Mix up the colors and don't do as I do, mix the purple, blue and green first, it will make your life easier!
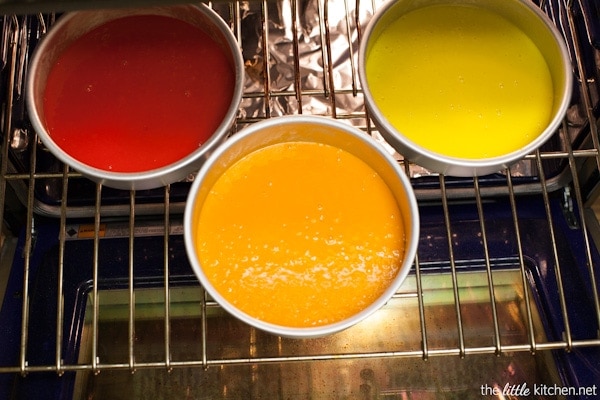
And bake them!
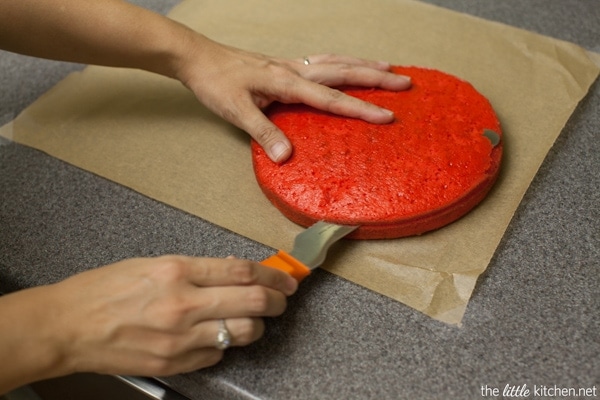
Allow the cakes to cool completely before handling them (on a cooling rack). Cut the tops of the cakes off to level them off. This is totally optional though. And remember this, the top of the cake is now the bottom of the cake. Remember that.
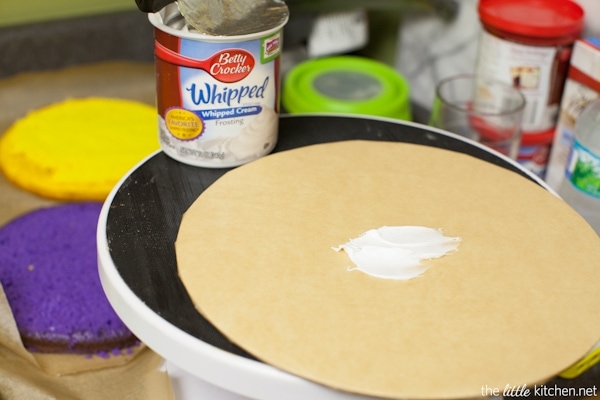
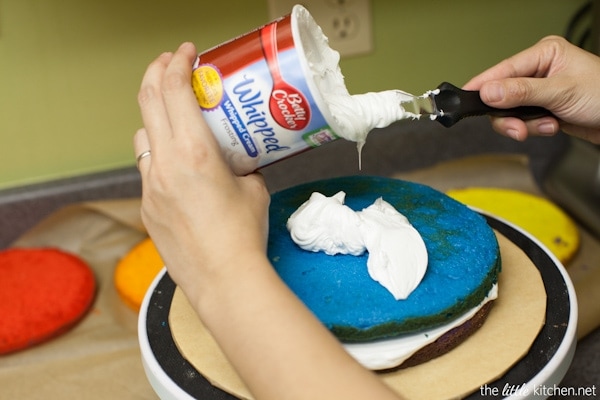
On a plate or cake stand, add a little bit of frosting (this will be like a clue for the cake). I used Betty Crocked Whipped Whipped Cream Frosting, it was so good!
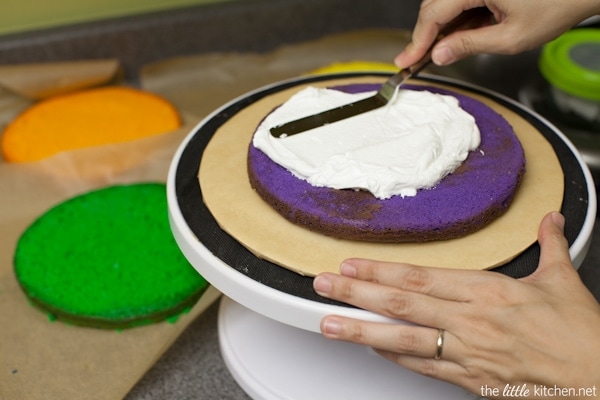
Add the first layer (purple), remember the top of the cake is now the bottom. Why do we put the bottom of the cake on top? Because it's flat and has no exposed crumbs, it will be easier to add the frosting and it will be level! Press the cake down and then start adding frosting.
I added about 1/4 to 1/3 of the can of frosting to each layer. Use an offset spatula to smooth out the frosting between the layers.
Yay, the next layer!
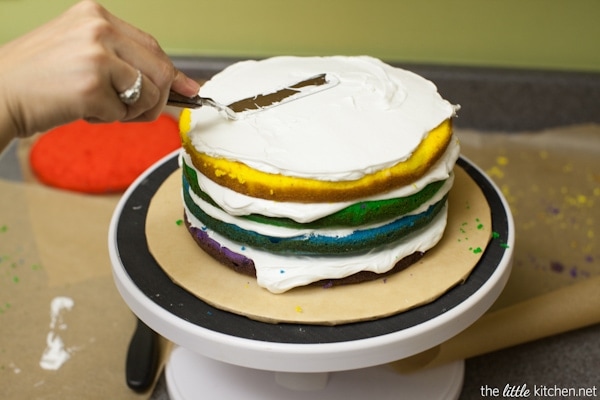
At this point, I was feeling so accomplished. Ignore the mess behind the cake…this is what happens when you're making a birthday cake…and it's okay!
Almost done!
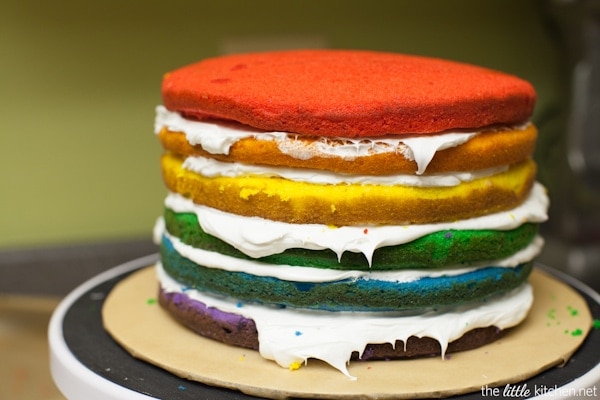
So exciting!
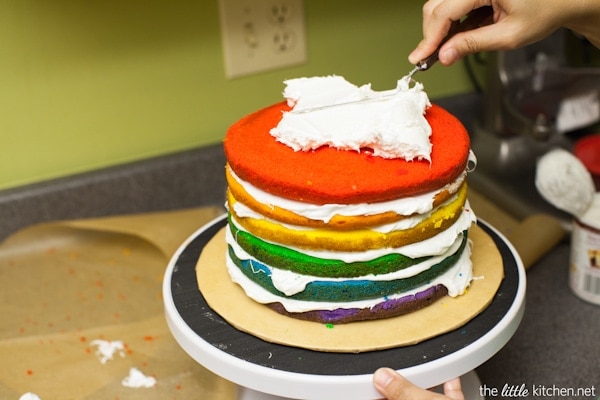
I added frosting to the top of the cake and smoothed it all out.
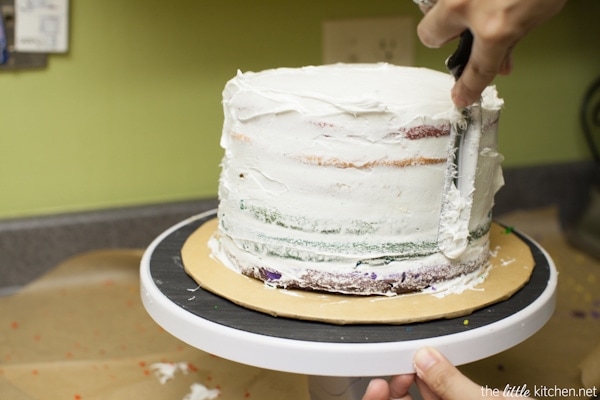
Now it's time to even out the sides with the frosting. Using any excess frosting that's sticking out between the layers, smooth it all out. This is the crumb coat, it's okay if there are crumbs showing.
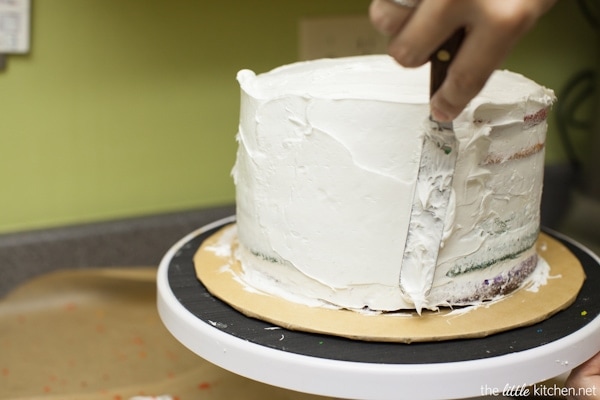
Add more frosting to the sides and use your spatula to spread it evenly.

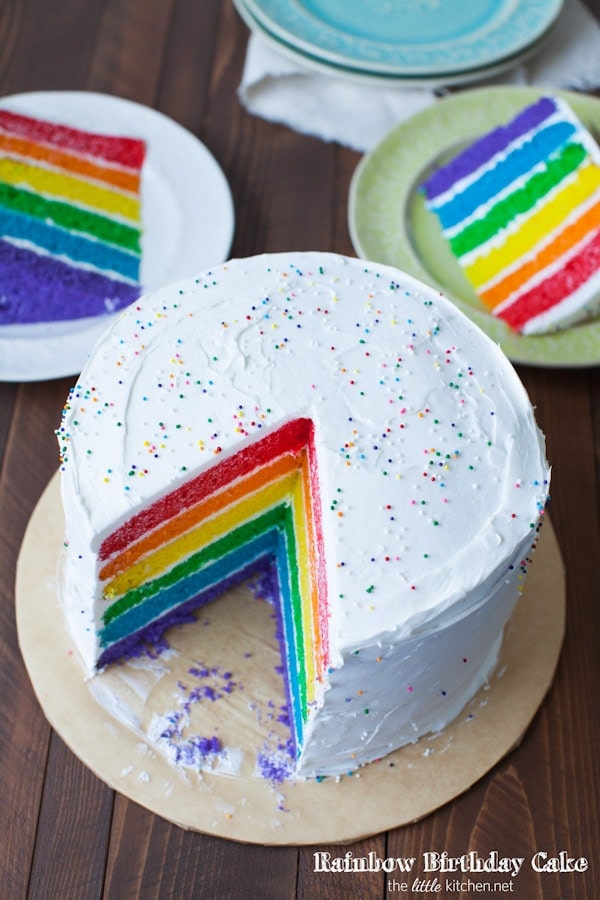
Done! I felt so accomplished and excited! I put the cake in the refrigerator overnight. Since it's a whipped cream frosting, I wanted to make sure it was completely stable before cutting into it.
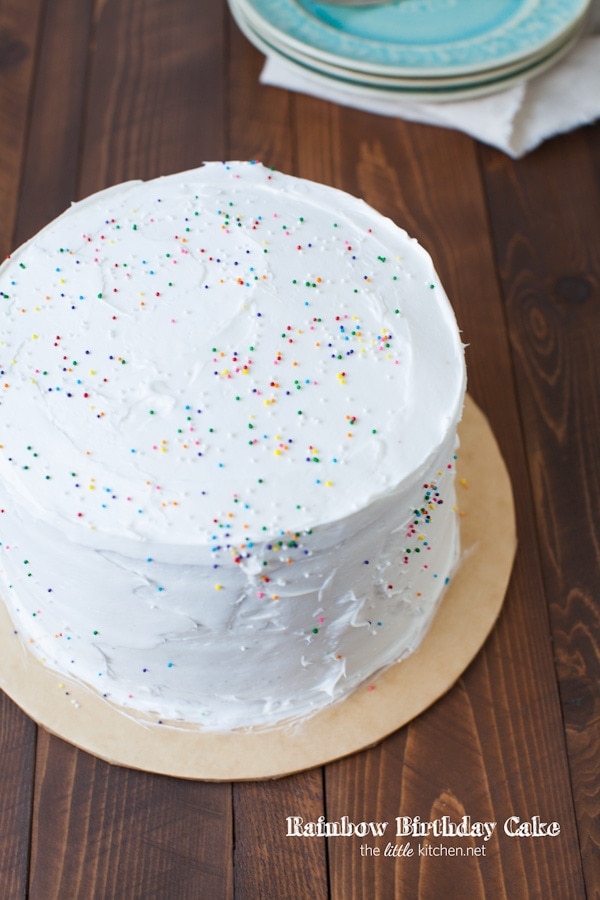
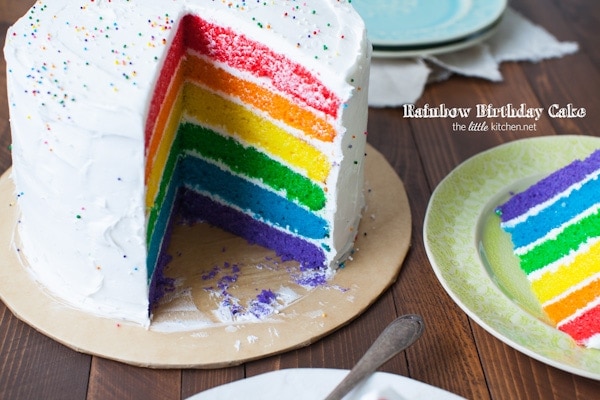
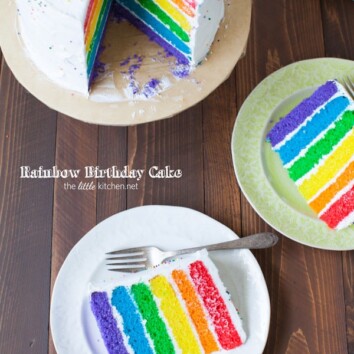
The next day I added nonpareils to it. So bright and pretty!
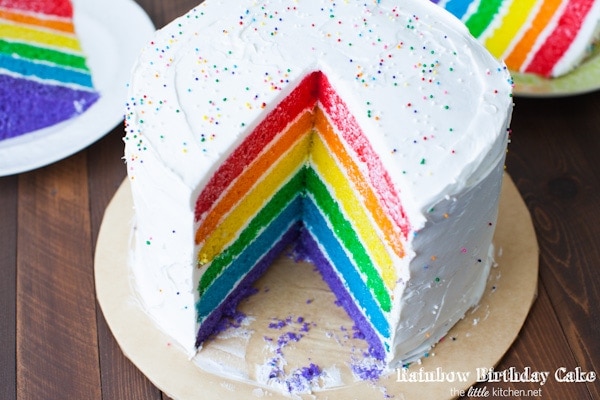
And I held my breath when I cut into it…
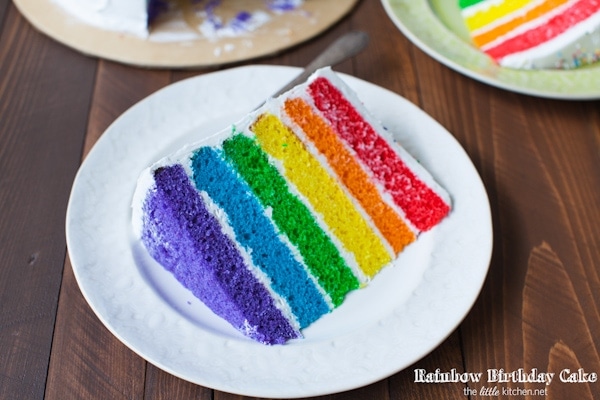
And literally squealed with excitement! I couldn't believe I did it…I was so excited and seriously, the gorgeous colors, it made me smile the entire day!
Now I'm more excited to try different color combinations and I'm definitely making this cake for my sister next February for her birthday. Love love love!
Be sure to stay tuned, I'm going to share more birthday ideas soon and be sure to follow Betty Crocker on instagram for more ideas!

Rainbow Birthday Cake
Ingredients
- 2 TWO packages Betty Crocker SuperMoist White Cake Mix (with Pudding in the Mix) (16.25 ounces)
- 2 cups water, divided
- 1 cup vegetable or canola oil, divided
- 6 eggs, divided
- gel food coloring, purple, blue, green, yellow, orange, red
- 3 THREE containers Betty Crocker Whipped Whipped Cream Frosting (12 ounces)
- Betty Crocker Decorating Decors, Nonpareil Decors
Instructions
- Heat oven to 350 degrees F. Using sheets of wax paper or parchment paper, trace along the edge of an 8-inch round pan. Do this 6 times and cut out round shapes. Spray the bottom of 3 (8-inch) round cake pans with baking spray. Place one sheet of cut out paper into each of the 3 round pans (or however many pans you have), press down to make sure the paper is flat. Spray the sides with baking spray and set aside.
- In a large mixing bowl, add one cake mix, 1 cup water, 1/2 cup vegetable oil and 3 eggs. Mix together until thoroughly incorporated, with a rubber spatula, about 1 or 2 minutes. Measure about batter evenly, you should be able to get about 1 1/4 to 1 1/3 cups batter for each pan.
- Using the food colors (in this order: purple, blue, green, yellow, orange, red) and working on one color at a time, drop 1 or 2 drops of gel coloring at a time into one bowl or measuring cup. Using a spatula, mix the batter. Add more color if necessary until you get the shade you want. Tint the divided batter for the first three colors.
- Pour the colored batters into separate cake pans. Make sure batter is spread evenly across the bottom of the baking pan by tilting it. Then, tap the cake pan on the counter a couple times.
- Bake for 15 to 16 minutes on the middle rack at 350 degrees F. Use a toothpick inserted in the center of the cake to measure doneness, there should be no wet cake mix visible and the toothpick should come out clean or with a little bit of crumbs. Allow cakes to cool for 5 to 10 minutes in the pan. Being very careful because the pans will be pretty warm or hot, flip the cake pans over cooling racks. Remove the paper and discard. Allow cakes to cool completely.
- Allow the cake pans to cool a little bit and then wash them. Bake and cool remaining 3 cake layers as directed repeating steps 2 to 5 with the remaining colors.
- Place each cake on a flat surface (I put them on parchment paper on my kitchen counter) and carefully trim rounded tops off cakes to level them (but this is optional).
- On a serving plate or I used a cardboard cake round that's covered in parchment paper, put a little bit of frosting on the plate. Place the purple cake layer (with the smooth side or bottom side UP) and push down with your hands to ensure the cake stays put.
- Add about 1/4/ to 1/3 can of frosting to the top of the cake. Frost the layer with frosting to within 1/4 inch of edge with an offset spatula. Repeat with blue, green, yellow, orange and red cake layers.
- Add frosting to the top of the cake and smooth it out. Using your spatula, even out the sides with frosting, add a light coat if needed. This will seal in the crumbs and it's okay if any cake is showing at this point. Add more frosting to the sides and spread evenly with the offset spatula.
- Refrigerated the cake for at least 4 hours or overnight before cutting. Add nonpareil decors and serve.
Pin it for Later
Disclosure: I'm thrilled to be working with Betty Crocker to #GetYourBettyOn! I only work with brands that I love and only share with you my honest opinions. This is a sponsored conversation written by me on behalf of Betty Crocker. The opinions and text are all mine.


Brenda Becker says
This turned out awesome. I added the center candy to surprise my grandson for his birthday.
Erica Rawson says
How tall did this cake end up being? What did you cover it with to put it in the fridge over night/how did you cover it?
Rosamonde Simone says
My kids are going to love your rainbow birthday cake because they love sweets. I am going to make it. Thank you
Linda says
Can you add the sprinkles immediately after frosting and then stick in the fridge overnight? I’m worried they might bleed over night but if I add them the next day, they won’t stick.
Julie Deily says
Hi Linda,
I think I added the sprinkles after refrigerating them…that’s why you don’t see that many sticking to them! And then I refrigerated it again after cutting it and it didn’t bleed. So your preference! But don’t cover it with plastic wrap if you do add them before refrigerating…they will definitely stick and bleed then. Put it in a cake plate and cover and then refrigerate.
You want to set it out for a while though because cold cake is not fun to eat! Good luck! Please share pics when you make it!
Stefanie says
I am making this cake for my daughters birthday. Do you think it would be good with your pudding frosting?
Jesse Hunter says
This is the one! Thank you – I love the instructions and the way you’ve laid it all out for a novice like me to follow. My daughter turns 6 on Saturday and we’ve agreed to make this rainbow cake. Yay!
I’m making my shopping list, though, and can’t seem to find anywhere around me that sells the Betty Crocker Whipped Whipped Cream Frosting. Has anyone used a slightly different frosting and been successful?
Thank you, Little Kitchen and friends. 🙂
Julie Deily says
Hi Jesse,
Please share photos when you’re done! I can’t wait to see! (tag me on social media and use the hashtag #thelittlekitchenrecipes or just email them to me!)
You can try Betty Crocker Whipped Vanilla frosting or their Whipped Cream Cheese Frosting!
Good luck!
Michelle R says
My daughter requested a rainbow cake for her 7th birthday next month, and am so glad I found your post!! Your step-by-step instructions look so easy to follow, and are taking away the anxiety from attempting this cake!
Carra Hoober says
Hi! I know this is an old post but to you recall what brand of food coloring you used? I can never get my red to look like real red! Thank you!!
Lori says
I’m making a unicorn called with rainbow layers for my granddaughters birthday. I’m wondering how tall this cake ends up being.
Thank you!
Sarah watt says
Hi there, I’m making this for my daughter’s bday . I want to make this cake and use butter cream icing. Would this be ok?
My daughter is so excited.
Julie Deily says
Hi Sarah,
Hope you got my email the other day saying yes, you totally can use buttercream!
🙂
saymay says
Hi Julie, this cake is beautful and exactly what my daughter requested for her 6th birthday! do you know the measurement of 1/3 of the prepared batter?
Julie Deily says
Hi Saymay!
Yay! She will love it! It’s about 1 1/4 to 1 1/13 cups. Hope that helps!
Alaina says
Thank you so much for this!!!! I just made my 17th Birthday cake using this recipe and it turned out AWESOME! Thanks again! Xoxo 🙂
Julie Deily says
Happy Birthday, Alaina!!! Please send me a picture! 🙂
Mary says
Hi! I’m planning to make a rainbow cake just like this one for my sister’s birthday in May. Would prefer to use a from scratch cake recipe instead of box mix. Do you have any recipes that would yield the same amount of cake for this one? Really appreciate the help <3
sb says
I was wondering how far in advance you could make this, two days before the party? Could you make the cakes ahead of time and freeze them? Any concerns with the weight of each layer on top of each other, cracks?? I love it and want to make it for a party
Julie Deily says
Hi SB, you can totally make it a few days ahead of time and stick it in the refrigerator all layered and decorated even. When you’re ready for your party…just take it out and let it sit on the counter for a few hours before serving.
Capri says
What kind of food coloring did you use?
StefZero says
Wow, it looks so colorful and so tasty. Thanks for sharing this recipe. I hope I can make it soon.
Julia says
This cake is stunning! I think I’m going to attempt to make it for National Coming Out Day on October 11. Quick question, do you think 9inch pans would make the cake layers too thin? Thanks so much for posting this and for your help!
Julie Deily says
Hi Julia,
That’s awesome!! Yay! I think you can do 9-inch pans…they will be thinner but I think it will be fine! Please share a picture with me on facebook/email/instagram! 🙂
Lilliam says
I think if you are afraid for them to be to thin in a 9″ pan, then instead of dividing the batter of eack box in 3 parts, do it in 2.
Sarah @ The Gold Lining Girl says
Oh my gosh… this cake looks *perfect*. You did an awesome job. I’m so impressed, and a little envious! Haha. It’s beautiful. “Baking bucket list”…lol! I never thought about it that way but I sorta have a list like that myself too. And this is on it!!
Sadaf Fatima says
wow, only one thing to remember VIBGYOR 🙂
Sophia @ NY Foodgasm says
OMG this cake…. REALLLLY?! AMAZING! I am so impressed with the execution!
Millie | Add A Little says
Love rainbow cakes! Its so pretty Julie!
Denise says
Super cute cake! I wish I had the patience to make one … adorable!
Marla Meridith says
Such a fun cake Julie!
Jenny @ BAKE says
I love how colourful each of these layers is! A rainbow cake is on my baking bucket list too
Kristina says
This cake sings of happiness- will have to try it myself 🙂
Sommer @ASpicyPerspective says
I want a big piece of this pretty cake! Pinned